Mom and I chose to feature the Trimming the Tree stamp set from the Annial Catalog in a recent episode of Sunday Stamping with Susan & Julie -- AFTER the Perfect Partners promotion in September. If you missed out on the coordinating dies offered during that promotion, you're in luck! All six die sets are now available in the Clearance Rack! Shop Now
My dies are on order, but here are the cards that I shared using just the stamp set. I used the Lights Aglow Designer Paper, which is now sold out, but you could easily substitute another Christmas-themed designer paper to create these same card layouts.
Watch the replay of Sunday Stamping with Susan & Julie to see more project ideas using the Trimming
Use Host Code42CWFHQ2 to get a FREE Project Kit andFREE GIFT when you order $40 or more. Free kits are mailed at the end of the month. Limit one per person. Shop Now
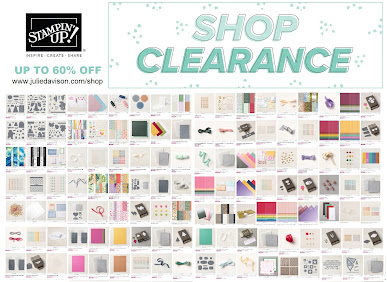
Holy smokes! Today starts an EPIC Last Chance Sale with over 20 items that are 60% Off -- PLUS over 150 New Clearance Rack Deals! These amazing prices won't last long, so don't wait to shop or you might miss out on your favorites!
Use Hostess Code42CWFHQ2 to get a FREE Project Kit andFREE GIFT when you order $40 or more. Free kits are mailed at the end of the month. Limit one per person. Shop Now
Stampin' Up! updated the Clearance Rack today with 30 new deals -- mostly last year's July-December Mini Catalog Favorites -- up to 60% off the original price! Shop early for the best selection!
Use Hostess CodeEB6ADWVJ to get a FREE Make and Take Kit andFREE GIFT when you order $40 or more. Free kits are mailed at the end of the month. Limit one per person. Shop Now
Use Hostess CodeCYFC9FQW to get a FREE Make and Take Kit andFREE GIFT when you order $40 or more. Free kits are mailed at the end of the month. Limit one per person. Shop Now
Stampin' Up! updated the Clearance Rack yesterday with some favorites from the last Annual Catalog. Check out the deals -- up to 60% off! One of my favorites is the Flowers for Every Season Designer Paper. Last year, I used this paper pack to design a desktop flip calendar and then I used the extra pieces to create a set of cards and some treat boxes. I love these projects so much I just had to re-share them! Grab a pack of the Flowers for Every Season paper and get started!
This epic One Sheet Wonder uses every piece of every pattern from the Flowers for Every Seasons Designer Paper! With 12 different patterns, that cover -- well, every season -- it was a natural choice for my first project, a desktop flip calendar.
Flip Calendar
I cut the designer paper into 3-1/4" x 5-1/4" pages and punched two holes at the top. (The holes are 1/2" from the top and 3/4" from each side.) I couldn't find a calendar template I liked, so I created by own! I printed the calendars and die cut them with the second largest scallop rectangle from the Stitched So Sweetly Dies.
Additional Supplies: 1-1/4" Loose Leaf Binder Rings; 4" x 6" Pedestal Frame (discontinued IKEA design, available on Amazon)
I cut the remaining designer paper (2-3/4" x 6") at 4" to create (12) 2-3/4" x 4" pieces. I cut (6) 3" x 4-1/4" pieces from one sheet of Basic White cardstock to use as the designer paper layers. Before adhering them together, punch or die cut a circle or tag shape. (This is a great way to conserve paper!) Mix and match from on In Color Cardstock Bases. Finished with the stamped tag, ribbon, and rhinestones.
Here are the finished cards;
2-4-6 Treat Boxes
There are two pieces of designer paper left from the original 6" x 6" Flowers for Every Season piece. I used them both on this next project! These cute little treat boxes are perfect party favors or use them for small gifts.
Directions:
Start with a 5-1/2" x 8-1/2" piece of cardstock. Using the Scoring Blade on your Stampin' Trimmer, score the cardstock at 2”, 4”, 6”, and 8”.
Turn the cardstock lengthwise and score once more at 2".
Cut the score lines on the shorter end up to the 2" score line you made in step 1. These flaps will become the bottom of your container. (You can completely cut off the small flap on the end.)
Put Tear & Tape adhesive on the side flap and 3 of the 4 bottom flaps and assemble the box.
To decorate each box, I used the 3/4" x 3-1/4" DSP strip leftover from the first project and the 2-3/4" x 2" pieces from the cards. Punch a tag from the larger piece of designer and use the small one as a banner. I added a stamped 1-1/2" circle and linen threat to finish it off.
Order the Stampin' Up! Products to Make These Projects:
Use Hostess CodeHT9EW7A6 to get a FREE Make and Take Kit andFREE GIFT when you order $40 or more. Free kits are mailed at the end of the month. Limit one per person. Shop Now
Stampin' Up! updated the Clearance Rack this morning with 36 new deals -- mostly from the Aug-Dec 2020 Mini Catalog. Stock up on your favorites, while supplies last! Shop Now
I used the Classic Christmas Designer Paper when it first came out to make this trio of cards with the Quite Curvy bundle. This paper is definitely not just for Christmas. Leave a comment and let me know which of these cards you like best!
I copied the last design right from the January-June Mini Catalog! Here is the inspiration project, created by a Stampin' Up! Concept Artist.
Watch the replay of this Thursday Night Stamp Therapy to see more projects created with the Classic Christmas Designer Paper when it was first released last fall.
Order the Stampin' Up! Products to Make These Projects:
Use Hostess CodeYKNVTHNVto get a FREE Make and Take Kit and FREE GIFT when you order $40 or more. Free kits are mailed at the end of the month. Limit one per person. Shop Now