Showing posts with label card makeover. Show all posts

Monday, May 14, 2018

Makeover Monday VIDEO: Birthday Delivery Card

Do you ever get "stuck" when you make a card and you're just not sure how to finish it? A few months ago, I asked my team to send me cards that they weren't sure how to finish. Barb Hopper Preiss sent me a birthday card that she created featuring the Birthday Memories Designer Paper. It's been sitting on my desk and I was inspired to get it out and give it a little card makeover. I shared a Facebook Live demonstration to talk about the changes I made. Click here to see more card makeovers.

Makeover Monday: Stampin' Up! Birthday Delivery Cake Card ~ www.juliedavison.com
Pin It!
Watch my Facebook Live demonstration to learn more about the changes that I made to my version of Barb's card. Follow me on Facebook for more video demonstrations like this one!

Here's a close-up of just my card. Make sure to get this fun paper before it retires! You'll want the framelits that coordinate so you can quickly and easily cut out the images (like the cake) from the designer paper.
Makeover Monday: Stampin' Up! Birthday Delivery Cake Card ~ www.juliedavison.com
Stampin' Up! Supplies: Birthday Delivery stamp set, Dapper Denim ink & cardstock, Real Red cardstock, Whisper White cardstock, Birthday Memories Designer Paper, Brights Enamel Shapes, Birthday Friends Framelits, Big Shot, Stampin' Dimensionals
Brights Enamel Shapes
[141680]
RETIRING
25% OFF


Live in the United States? I would love to be your Stampin' Up! Demonstrator!
Click HERE to  Order Stampin' Up! Products Online, Anytime!

Use Hostess Code JNSFR7Z2 to get a FREE Make and Take Kit and FREE GIFT when you order $40 or more. Free kits are mailed at the end of the month. Limit one per person. Learn More

RETIRING LIST: PDF | Sortable Excel
VIDEO: Get all of the details about the Color Revamp & Last Chance List


Tuesday, December 19, 2017

Hello Friend Card Kit Christmas Makeover

I'm still working on Christmas cards this week and I turned to an unlikely place -- the Hello Friend Heat Embossing Kit from the Annual Catalog -- to finish them up! I purchased multiple kits this summer and had already used up the other designs.
Stampin' Up! Hello Friend Card Kit Christmas Makeover ~ www.juliedavison.com
Pin It!
Even though this card was designed to be more of a spring card, I thought the wreath and colors were perfect for Christmas! I stamped a bow and sentiment from Holly Berry Happiness stamp set to make it a little more festive. You could also add pearl colored with the Stampin' Blends marker if you want to add more color to the wreath.
Stampin' Up! Hello Friend Card Kit Christmas Makeover ~ www.juliedavison.com
Pin It!

The wreath and border are pre-printed on the cardstock from the card kit, but you can stamp your own wreath using the Hello Friend stamp set!

Check out this video from Stampin' Up! to learn more about the Hello Friend Card Kit:


Stampin' Up! Supplies: Holly Berry Happiness stamp set, Real Red ink, Whisper White cardstock, Holly Berry Builder Punch, Hello Friend Heat Embossing Project Kit, Stampin' Dimensionals
 
Live in the United States? I would love to be your Stampin' Up! Demonstrator!
Click HERE to  Order Stampin' Up! Products Online, Anytime!

December Specials:
Clearance Rack Refresh: up to 70% off discontinued products
2017 Holiday Catalog Retiring List  (.pdf)

Reserve your Stamparatus Now!

Use Hostess Code CZ6PN4UJ to get a FREE Make and Take Kit and FREE GIFT when you order $40 or more. Free kits are mailed at the end of the month. Limit one per person. Learn More

Monday, May 25, 2015

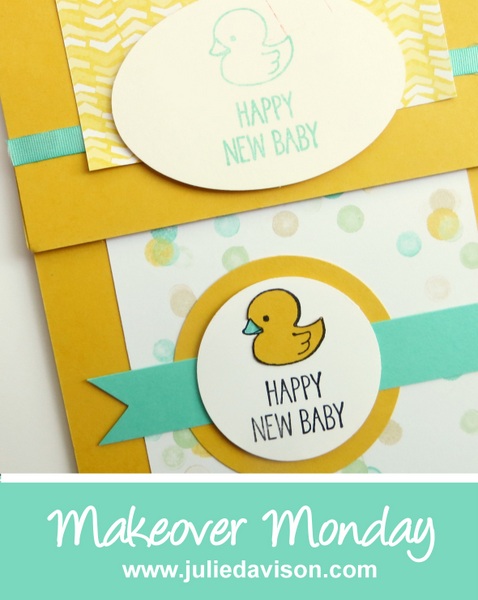
Makeover Monday: One Tag Fits All Baby Card


I'm a few hours late because I feel asleep working last night, but I'm going to back-date this post because I can't have "Makeover Monday" on Tuesday! ha ha!

I teamed up with my friend Jen Davidson again for a card makeover featuring the One Tag Fits All stamp set from the Occasions Catalog. Check it out:
Makeover Monday BEFORE Card featuring One Tag Fits All #stampinup www.juliedavison.com
Before

Makeover Monday AFTER Card featuring One Tag Fits All #stampinup www.juliedavison.com
After

Pin It!
Jen tends to create monochromatic cards because she's not sure what colors to pair together. My advice is to choose designer paper with several colors, like the Lullaby design in the "After" card. Then pull the color combination from that design. In this case, I didn't end up using any additional colors from the design (Hello Honey, Coastal Cabana, Pistachio Pudding, and Sahara Sand), but by using a design that incorporates both the Hello Hone and the Coastal Cabana, it pulls those two colors together and makes them seem less random.

Other changes:
  • I extended the designer paper to both edges of the card.
  • I changed the shape of the greeting layer to better fit the image size and layered it.
  • I stamped the image in black and colored it to make it POP.
  • I changed the ribbon to a wider piece of cardstock to create a strong base and "anchor" down the stamped image.
If I could only change ONE thing about Jen's card it would be to stamp the image in black and color it. This single thing would really make her card pop. Not sure which black ink to choose?
http://www.stampinup.com/ECWeb/CategoryPage.aspx?categoryid=1807&dbwsdemoid=50776


http://www.stampinup.com/ECWeb/ProductDetails.aspx?productID=138583&dbwsdemoid=50776
Stampin' Up! Supplies: One Tag Fits All stamp set, Jet Black Staz-n Ink pad, Hello Honey cardstock, Coastal Cabana marker & cardstock, Whisper White cardstock, Lullaby Designer Paper, 2" Circle Punch, 2-1/2" Circle Punch

Click HERE to  Order Stampin' Up! Products Online, Anytime!


http://www.stampinup.com/ECWeb/ItemList.aspx?categoryid=1894&dbwsdemoid=50776

Last Chance for Retiring Products
Download the List: PDF | Excel
Shop Now

Use Hostess Code
CUE3JSAT to get a FREE Make and Take Kit and FREE GIFT when you order $40 or more. Learn More
http://juliedavison.blogspot.com/2015/05/new-annual-catalog-details-sneak-peek.html

Monday, April 6, 2015

Makeover Monday: Rule of Thirds

Stampin' Up! Amazing Birthday -  Makeover Monday: Rule of Thirds Design Principle www.juliedavison.com
It's time for another Makeover Monday! I teamed up with my friend Jen Davidson to share some simple tips for making over your stamped creations.

For today's card, I applied the Rule of Thirds to make the flower more visually appealing. I also introduced more color by changing the flower color and introducing another layer of cardstock (the banner) to make the focus point pop against the busy pattern of the designer paper. In addition, I decreased the size of the designer paper (from 4" x 5-1/4" to 3-3/4" x 5") on the card base.
Before
Stampin' Up! Amazing Birthday - Makeover Monday: Rule of Thirds Design Principle www.juliedavison.com
After
Makeover Monday: Rule of Thirds Design Principle www.juliedavison.com
Are you familiar with the Rule of Thirds? I try to keep this design principle in mind when I create my cards. Essentially, you divide your design space into thirds, both horizontally and vertically so that you have nine sections. It is most aesthetically pleasing for the focal point (or "important compositional elements") to fall at one of the intersections. Learn More about the Rule of Thirds

Stampin' Up! Supplies: Amazing Birthday stamp set, Calypso Coral ink & cardstock, Coastal Cabana cardstock, Crushed Curry cardstock, Whisper White cardstock, Best Year Ever Designer Paper (SAB), Blossom Punch, 1-1/4" Circle Punch

Monday, March 30, 2015

Makeover Monday: Amazing Birthday Panel Card

Makeover Monday: Amazing Birthday Panel Card #makeover #stampinup www.juliedavison.com
It finally feels like spring this Monday morning in central Illinois. The birds are singing; the sun is shining. It's going to be a beautiful day! Spring is a fresh start. And it in that spirit, I'm excited to introduce a new series on my blog: Makeover Monday. I'm teaming up with my friend Jen Davidson again to share some simple tips for making over your stamped creations. Click here to check out some other card makeovers that Jen and I created.
Before
I like the layout that Jen used for this card, but I felt like the designer paper was too busy. The stamped images feel lost and the card kind of looks washed out. I kept the same layout for my card, but shortened the panels just a little so you could see more of the base card color. (The panels on the "after" card are 3-3/4" x 1-1/8".) I limited the busy pattern to one panel and introduced more colors from the designer paper: Coastal Cabana, Hello Honey, and Calypso Coral. I stamped each image in the same color as the cardstock panels to make them pop.
Makeover Monday: Amazing Birthday Panel Card #makeover #stampinup www.juliedavison.com
After
Pin It!
http://www.stampinup.com/ECWeb/ProductDetails.aspx?productID=134228&dbwsdemoid=50776
Stampin' Up! Supplies: Amazing Birthday stamp set, Calypso Coral ink & cardstock, Hello Honey ink & cardstock, Coastal Cabana ink & cardstock, Soft Suede cardstock, Whisper White cardstock, Best Year Ever Designer Paper (SAB), 1-3/8" Circle Punch, Stampin' Dimensionals

Click HERE to  Order Stampin' Up! Products Online, Anytime!


Sale-a-Bration: LAST CHANCE!
Get one FREE for every $50 you order
View Online | NEW products | More Choices

Use Hostess Code JTPFT7HS to get a FREE Make and Take Kit and FREE GIFT when you order $40 or more. Learn More
 

Sunday, December 7, 2014

Little Buddy Birthday Flip Card

Did you like the Little Buddy Birthday cards I posted yesterday? (See them here.) Here's another card that Jen and I collaborated on. I don't have a picture of the "before", so I'll just have to tell you how I tweaked it.
Stampin' Up! Little Buddy Birthday Circle Flip Card #stampinup #kids www.juliedavison.com
Pin It!
Jen created this flip card with the Circle Card Thinlit. She slipped one end through the framelit so it would fold back on and create a flap. On the flap she adhered the polka dot designer paper. She stamped the greeting in Tempting Turquoise and punched it with a large oval punch.

I changed her monochromatic colored image by stamping the dinosaur in black ink and coloring with Old Olive, Hello Honey, and Tempting Turquoise. Following my rule of using each color more than once, I changed the scallop circle layer to Hello Honey and added an Old Olive strip of cardstock to the edge of the flap. Finally, I introduced another stamped image by creating a tone-on-tone background with the birthday cake.

Stampin' Up! Supplies: Little Buddy Birthday stamp set, Tempting Turquoise ink/marker & cardstock, Hello Honey marker & cardstock, Old Olive Blendabilities & cardstock, Whisper White cardstock, Large Oval Punch, 1-3/4" Circle Punch, 2-3/8" Scallop Circle Punch, Brights Designer Paper Stack, 2-Way Glue, Dazzling Diamonds Glitter, Circle Card Thinlit
http://www.stampinup.com/ECWeb/ProductDetails.aspx?productID=133863&dbwsdemoid=50776
 Click HERE to Order Stampin' Up! Products Online, Anytime!

Stampin' Up! Year-End Closeout Sale
AMAZING Deals: Up to 80% Off!
SHOP NOW

Use Hostess Code WH2UXMUW to get a FREE Make and Take Kit and FREE GIFT when you order $40 or more. Learn More

Friday, December 5, 2014

Litte Buddy Birthday Card Makeovers: Before & After

I asked my friend Jen Davidson to be a "Guest Artist" for my Team Newsletter this fall. She picked the Little Buddy Birthday stamp set from my stash and created a set of cards. Jen felt limited with her supplies and struggled to find her Little Buddy mojo. I think her cards just needed a little more color. I sat down with the intention of just re-stamping the images in black and coloring them, but I ended up adding a few more tweaks. Here are the Before & After photos of two of the cards.
Before
Stampin' Up! Little Buddy Birthday card #stampinup www.juliedavison.com
After

For the first card, I kept the same Strawberry Slush card base and designer paper layers. My original intention was to just re-stamp the dinosaur in black and color with markers, but when I added the balloon, the image no longer fit in the Chalk Talk framelit shape. Whenever I introduce a new color on a project, I try to use it more than once, so I added layers of Coastal Cabana and Daffodil Delight to go with the markers I used to color the dinosaur. Finally, I added white ribbon to pull it all together.

Before
Stampin' Up! Little Buddy Birthday card #stampinup www.juliedavison.com
After
For the second card, I used the same piece of Designer Paper and turned it to go horizontally across the card. I used the same Strawberry Slush banner, but cut down the stamped image on a smaller square. I stamped the parrot in black ink and colored with markers. I layered these pieces on Crisp Cantaloupe to contrast with the Strawberry Slush. Finally, I introduced another stamped image (the cake) in the corner of the card for added interest.

It's amazing how a little bit of color can make all the difference! Leave me a comment and let me know what you think of these card makeovers!

http://www.stampinup.com/ECWeb/ProductDetails.aspx?productID=133863&dbwsdemoid=50776
 Click HERE to Order Stampin' Up! Products Online, Anytime!

Stampin' Up! Year-End Closeout Sale
AMAZING Deals: Up to 80% Off!
SHOP NOW

Use Hostess Code WH2UXMUW to get a FREE Make and Take Kit and FREE GIFT when you order $40 or more. Learn More