Welcome to the Stampin’ Creative Global Blog Hop! Currently you are visiting Julie Davison from the middle of the United States (Central Illinois to be exact!). This month, my friends from around the world and I are sharing fun fold cards.
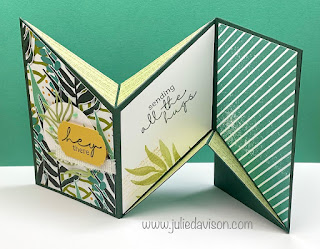
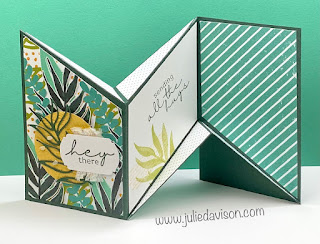
I created a Miura Fold (aka Mirror Fold) Card after receiving a card from Mercy Ermakov for the Great, Big Card Swap. I followed a tutorial by Sarah Levin to get the measurements to make my card. After getting over my own measuring error, I found the card was not as hard as it looked!
When I demonstrated this fun fold during a episode of Sunday Stamping with Susan & Julie last month, Kathe D pointed out that the name of the fold is actually Miura, not "Mirror". (The confusion may come into play because of the pronunciation of the name.) Here is some background information from Wikipedia about the Miura Fold.
From Wikipedia: The Miura fold is a method of folding a flat surface such as a sheet of paper into a smaller area. The fold is named for its inventor, Japanese astrophysicist Kōryō Miura.
The crease patterns of the Miura fold form a tessellation of the surface by parallelograms. In one direction, the creases lie along straight lines, with each parallelogram forming the mirror reflection of its neighbor across each crease.
I used the Artfully Composed Suite from the January-June 2022 Stampin' Up! Mini Catalog to create my card. I love the colors in this paper!
Muira Fold Card Measurements:
5-1/2" x 10-1/2" Card Base, scored at 3-1/2" and 7"
(2) 3-1/4" x 5-1/4" Designer Paper
(2) 3-1/4" x 5" Basic White
(2) 1-3/4" x 3-1/4" Designer Paper
3-1/2" x 5-1/2" Back for card base.
Directions:
Directions:
- Score card base at 3-1/2" and 7".
- Measure and mark 2" from top of the first score line. Score diagonally from score mark up to each section corner.
- Measure and mark 2" from the bottom of the second score line. Score diagonally from score mark down to each section corner.
- Measure and mark 2" on the side of large designer paper and cut up to the opposite corner.
- Measure and mark 1-15/16" from each end on opposite sides and then cut from marks to the opposite corners to make a trapezoid for the "inside" -- optional, for colored card bases.
- Cut smaller pieces of designer paper in half diagonally. (Make sure to cut the second piece in the opposite diagonal direction.)
- Layer and embellish card as desired.
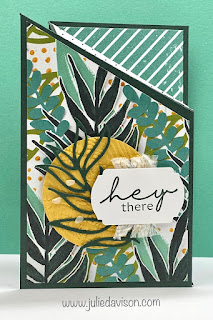
I created two different versions of the front. Which one do you prefer? Leave a comment and let me know!
That's all from me today! Thank you for visiting! For now, it's time to carry on with the blog hop and see what other amazing fun folds that my Stampin' friends from around the world have created for you!
Ready to give this card a try at home? Watch the replay of Sunday Stamping with Susan & Julie to follow along with me as I demonstrate how to make the Miura Fold (aka Mirror Fold) Card.
Order the Stampin' Up! Products to Make This Project:
Live in the United States?
Shop with Me for a FREE gift! http://juliedavison.com/shopUse Hostess Code 76PA9J4P to get a FREE Make and Take Kit and FREE GIFT when you order $40 or more. Free kits are mailed at the end of the month. Limit one per person. Shop Now
Rainbow of Happiness Cards
- Stamp Along with Me! Reserve a Card Kit
- PDF Tutorials Available on Etsy
- Watch on YouTube: Mon, April 4, 2022 7 pm CT
Get up to 50% Off Retiring Favorites!
While Supplies Last until May 2, 2022
- Easy-to-Read Last Chance List (.pdf) - FULL LIST of all retiring products
- Shop with Julie


6 comments:
Julie, this looks incredible! Thanks so much for posting the instructions too! Love it!
wow this an amazing fun fold - I love it !
Wooaahha That is some fold! I love it, and it looks actually much easier than it looks - which is true for a lot of fun folds!! Thanks for sharing & all the background too. Those Japanese folders are incredible!
Wow! I haven’t seen this fold before. I need to give it a try
WOW! I've never seen THIS fold before - I love it! I'll add it to my must-do list. TFS!
Wow, wow, wow ... what an impressive card. Can't wait to give this a go as never seen it before! Thanks for sharing Julie
Post a Comment