Showing posts with label ciLiving. Show all posts

Tuesday, October 4, 2016

September 2016 Paper Pumpkin Alternative Ideas + TV segment

https://www.paperpumpkin.com/en-us/sign-up?demoid=50776
I love Paper Pumpkin! This monthly project kit subscription is perfect for new crafters and busy crafters -- okay ALL crafters! People who don't have a lot of space for craft supplies. People who just want to sit down and craft and don't want to do the work of designing and cutting materials. Paper Pumpkin is like a class in a box, delivered to your mailbox each month.
http://mypaperpumpkin.com/en/?demoid=50776
If you have never tried Paper Pumpkin -- now is a great time! New subscribers who sign up now and take advantage of the BOGO sale -- that's Buy One, Get One FREE! Pay for your first month and your second month will be free! Subscribe Now

Each month the kit is a surprise. Usually it's a good surprise, but sometimes it may not be a kit you love. My job as your demonstrator is to help inspire you to think outside the box and turn your kit into projects that you'll adore. In addition to sharing 10-12 bonus tutorials with my subscribers each month, I also make alternative projects to share on my blog. This month, I took my alternative kit projects to WCIA's ciLiving and talked about Paper Pumpkin. (Watch a video of my segment here.)
http://www.illinoishomepage.net/ciliving-tv/cihobby/fun-monthly-craft-projects

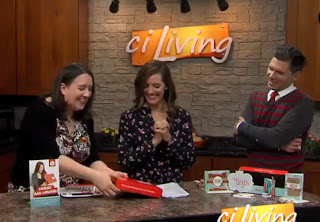
ciLiving host Matt Metcalf said that Paper Pumpkin is so easy that even he could do it!

The September 2016 Paper Pumpkin Kit includes everything to make 16 of these Halloween/Autumn treats. (The cardstock holder was for display was not included in the kit.)
September 2016 Paper Pumpkin Bonus Ideas for "Something Good to Eat' by Julie Davison www.juliedavison.com
You can fill the test tubes with anything you want. I filled mine with Mini M&Ms, sunflower seeds, Smarties, and Reese Pieces. But I didn't stop there! I filled some with cocoa, candy canes, and sprinkles! Just think of the possibilities! Confetti for New Years, Seasoned Salt for Father's Day...
September 2016 Paper Pumpkin Bonus Ideas for "Something Good to Eat' by Julie Davison www.juliedavison.com
Pin It! 
Additional Stampin' Up! Supplies: Designer Tin of Cards stamp set, Cherry Cobbler ink pad, Tin of Tags Project Kit, Real Red Stitched Edge Ribbon
September 2016 Paper Pumpkin Bonus Ideas for "Something Good to Eat' by Julie Davison www.juliedavison.com
Pin It! 
Additional Stampin' Up! Supplies: Designer Tin of Cards stamp set, Every Occasion stamp set, Flirty Flamingo ink pad, Basic Black ink pad, Clear Wink of Stella, Gusseted Cello Bags, Silver Ribbon, Whisper White Baker's Twine, 1/8" Circle Punch
Test Tubes aside, this kit also includes some fun tags and flags that can be used on other projects. Check out what I created with this kit.
September 2016 Paper Pumpkin Bonus Ideas for "Something Good to Eat' by Julie Davison www.juliedavison.com
Pin It! 
Additional Stampin' Up! Supplies: Soft Suede ink & cardstock, Whisper White cardstock, Crushed Curry cardstock, Petal Burst Embossing Folder, Stampin' Dimensionals
September 2016 Paper Pumpkin Bonus Ideas for "Something Good to Eat' by Julie Davison www.juliedavison.com
Pin It! 
Additional Stampin' Up! Supplies: Spooky Fun stamp set, Halloween Scene Framelits, Basic Black ink, Basic Gray marker, Pumpkin Pie marker, Halloween Night Designer Paper, Silver Foil Sheets, Stampin' Dimesionals
September 2016 Paper Pumpkin Bonus Ideas for "Something Good to Eat' by Julie Davison www.juliedavison.com
Pin It!
Additional Stampin' Up! Supplies: Rich Razzleberry ink & cardstock, Basic Black cardstock, Scalloped Tag Topper Punch, Basic Black Baker's Twine, Stampin' Trimmer, Tear & Tape Adhesive, Stampin' Dimensionals
  • 2" x 9" Rich Razzleberry cardstock, score at 4" and 5".
  • 6-1/2" x 1-1/2" Basic Black cardstock, score at 2", 3", 5" and 6".
 Watch my video to see all of these projects and learn how to make this Tag Topper Treat Holder:

Have you tried Paper Pumpkin yet? I love it and I know you will too! Paper Pumpkin is a fully designed crafting kit that arrives at your door each month with stamps, ink, and paper -- everything cut and ready to go, so you can skip to the fun.


Sign up by October 10th to receive the October kit!


New subscribers: Use promo code BOGO to get your second month free!
http://mypaperpumpkin.com/en/?demoid=50776
Join my Paper Pumpkin Patch and get 10-12 bonus project sheets with different ideas to use your kit -- similar to the ones I've shared here.
September 2016 Paper Pumpkin Bonus Ideas for "Something Good to Eat' by Julie Davison www.juliedavison.com

Did you know...Paper Pumpkin Subscribers can purchase past kits and refills, including the refill for the September 2016 Something Good to Eat Project Kit.  Check it out here.
Click HERE to  Order Stampin' Up! Products Online, Anytime!

October Specials
http://juliedavison.com/shop
Use Hostess Code YFJ9JGCC to get a FREE Make and Take Kit and FREE GIFT when you order $40 or more. Free kits are mailed at the end of the month. Limit one per person. Learn More
 
2016 Stampin' Up! Holiday Catalog


Thursday, August 11, 2016

As Seen on TV: Back to School Teacher Treat 2-4-6 Box with Thoughtful Branches

Stampin' Up! Fruit Stand + Thoughtful Branches Back to School Teacher Treat 2-4-6 Box #stampinup #thoughtfulbranches www.juliedavison.com
Pin It!
Back to school means new teachers to spoil! Today, I did a Creative Corner segment on ciLiving to share this 2-4-6 gift box for our new teachers. (For those of you who live outside of Central Illinois (ci), ciLiving is our CBS affiliate afternoon talk show that shares human interest and community stories.)
http://www.illinoishomepage.net/ciliving-tv/cihobby/creative-gifts-for-teachers
The 2-4-6 box is super easy to make plus it reminds me of that old cheer "2-4-6-8 who do we appreciate?" And we definitely appreciate our teachers!

Stampin' Up! Fruit Stand + Thoughtful Branches Back to School Teacher Treat 2-4-6 Box #stampinup #thoughtfulbranches www.juliedavison.com
Pin It!

You'll need a half sheet of cardstock (5-1/2" x 8-1/2") to make this box. This box is easy enough to make up just a few or a whole lot for small gifts or party favors. It would be perfect for a wedding, baby shower, birthday party, or holiday. My favorite part is the coordinating designer paper (1" x 3" wrap around the chocolate nuggets to go inside the box.

Watch my Creative Corner segment on ciLiving here.
http://www.illinoishomepage.net/ciliving-tv/cihobby/creative-gifts-for-teachers
Directions:
  1. Using the Scoring Blade on your Stampin' Trimmer, score the cardstock at 2”, 4”, 6”, and 8”.
  2. Turn the cardstock lengthwise and score once more at 2".
  3. Cut the score lines on the shorter end up to the 2" score line you made in step 1. These flaps will become the bottom of your container. (You can completely cut off the small flap on the end.)
  4. Put Tear & Tape adhesive on the side flap and 3 of the 4 bottom flaps and assemble the box.
Stampin' Up! Supplies: Thoughtful Branches stamp set, Old Olive ink & cardstock, Early Espresso ink & cardstock, Whisper White cardstock, Fruit Stand Designer Paper, Triple Banner Punch, 1-1/2" Circle Punch, Beautiful Branches Thinlits, Gold Sequin Trim, Gold Binder Clips, Whisper White Thick Baker's Twine
 
Click HERE to  Order Stampin' Up! Products Online, Anytime!

BONUS DAYS: Time to Redeem your $5 Coupons!
 
Use Hostess Code
VJEEBDCF to get a FREE Make and Take Kit and FREE GIFT when you order $40 or more. Free kits are mailed at the end of the month. Limit one per person. Learn More

http://www.stampinup.com/ECWeb/ProductDetails.aspx?productID=144328&dbwsdemoid=50776

Friday, May 20, 2016

As Seen on TV: Graduation Diorama Card for Class of 2016

I pre-taped a Creative Corner segment for ciLiving that is going to air today. Central Illinois fans, be sure to tune in and watch it live between 4-5 pm on WCIA today. I'll update this post with the link to the video once it's posted.

I had so much fun creating diorama cards. It's really easy once you know how to cut and score the cardstock. One of my favorite cards was this graduation card. I think any graduate would love these blingy gold number. This is definitely a card you can keep on display throughout the graduation open house season!
Pin It! 
The question I get asked the most when I share diorama cards like this is "where do you write?" You can write on the inside of the back side of the diorama card. But if you have a lot to say, you may consider adding a small card to the back of the diorama. This will also act as an easel and help keep the card upright. I used the Pocketful of Cheer stamps from the March 2016 Paper Pumpkin kit to decorate the mini card on the back. The finished card size is 3" x 3-3/4".
In case you missed it, check out my video tutorial to learn how to make the diorama card and see more samples of this fun technique!


Stampin' Up! Shopping List: Bravo stamp set, Basic Black ink pad, March 2016 Paper Pumpkin stamp set, Whisper White cardstock, Gold Glimmer Paper, Large Number Framelits, 2-1/2" Circle Punch, 1-3/8" Circle Punch, 1-3/4" Scallop Circle Punch

Click HERE to  Order Stampin' Up! Products Online, Anytime!

Where do stamps go when they retire? Hopefully, your house!
Retiring List -- up to 50% Off

Julie's Bonus Project Kit for May 2016 -- free with $40+ order. Shop now at http://juliedavison.com/shop
Use Hostess Code DNF2WUJK to get a FREE Make and Take Kit and FREE GIFT when you order $40 or more. Free kits are mailed at the end of the month. Limit one per person. Learn More  


*IMPORTANT* Make sure to "opt-in" to contact with me, your demonstrator, so that I know who/where to send your free kit!