Showing posts sorted by relevance for query brayer. Sort by date Show all posts

Tuesday, January 30, 2024

VIDEO: Stampin' Up! Bee My Valentine Treat Box with Brayer Bubble Wrap Technique

VIDEO: Stampin' Up! Bee My Valentine Treat Box with Brayer Bubble Wrap Technique | Bee Mine Suite | Jan-Apr 2024 Stampin' Up! Mini Catalog | www.juliedavison.com #stampinup
Stampin' Up! has had several iterations of a brayer over the years. We've had sponge brayers and rubber brayers -- and now a silicone brayer! Brayers are perfect for evenly spreading ink while you're crafting -- whether that is direct to paper, across a background stamp, or on an embossing folder! Check out past projects on my blog that feature the brayer.

VIDEO: Stampin' Up! Bee My Valentine Treat Box with Brayer Bubble Wrap Technique | Bee Mine Suite | Jan-Apr 2024 Stampin' Up! Mini Catalog | www.juliedavison.com #stampinup
One technique that I fondly remember is the Bubble Wrap Technique -- using the brayer to ink up a piece of bubble wrap and then transferring the pattern to the project. It kind of looks like a beehive, so this technique is perfect for the new Bee Mine Suite! I used designer paper and the Be My Valentine bundle to create this treat box.
VIDEO: Stampin' Up! Bee My Valentine Treat Box with Brayer Bubble Wrap Technique | Bee Mine Suite | Jan-Apr 2024 Stampin' Up! Mini Catalog | www.juliedavison.com #stampinup

VIDEO: Stampin' Up! Bee My Valentine Treat Box with Brayer Bubble Wrap Technique | Bee Mine Suite | Jan-Apr 2024 Stampin' Up! Mini Catalog | www.juliedavison.com #stampinup


Watch the replay of Thursday Night Stamp Therapy to see how I created this project:

Order the Stampin' Up! Products to Make This Project:


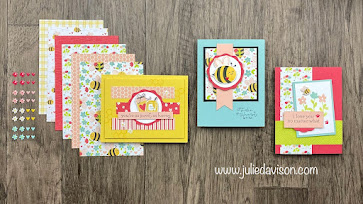
LAST DAY!! Order $40 or more in January and get the January Bonus Project Kit & Back Pocket Card Layout with materials to make three cards plus a sampling of the Bee Mine Designer Paper and a half package of the Adhesive Backed Hearts & Flowers! Use Hostess Code XTNRHQWJ for orders under $150.
Stampin' Up! Bee My Valentine Card Kit | Bee Mine Suite | Jan-Apr 2024 Stampin' Up! Mini Catalog #stampinup

Here are a few more Bee Mine projects created by Stampin' Up! Concept Artists for the January-April 2024 Mini Catalog to inspire you. 
Stampin' Up! Bee My Valentine Project | Bee Mine Suite | Jan-Apr 2024 Stampin' Up! Mini Catalog | #stampinup

Stampin' Up! Bee My Valentine Project | Bee Mine Suite | Jan-Apr 2024 Stampin' Up! Mini Catalog | #stampinup

Stampin' Up! Bee My Valentine Project | Bee Mine Suite | Jan-Apr 2024 Stampin' Up! Mini Catalog | #stampinup

Stampin' Up! Bee My Valentine Project | Bee Mine Suite | Jan-Apr 2024 Stampin' Up! Mini Catalog | #stampinup


Live in the United States? 
Shop with Me for a FREE gift! http://juliedavison.com/shop

Use Hostess Code 3QZB7RRD for February 2024 to get a FREE Make and Take Kit and FREE GIFT when you order $40 or more. Free kits are mailed at the end of the month. Limit one per person. Shop Now

NEW! Jan-Apr 2024 Mini Catalog


Sale-a-Bration 2024: Get one free gift for every $50 that you order. (Or choose a Level 2 gift with a $100 purchase.) No limit!  Shop Online Now. Add your merchandise to the Shopping Cart and then choose your free gift selections when your check out.  

Thursday, May 1, 2025

5 Stampin' Up! Lily Pond Lane Card Ideas & Rubber Band Brayer Technique

The first time I played with the Lily Pond Lane Designer Paper was last spring when I brought home a package as a door prize after OnStage. I created these cards for an episode of Sunday Stamping with Susan & Julie. 
5 Stampin' Up! Lily Pond Lane Card Ideas with Thoughtful Moments Hybrid Embossing Folder & Rubber Band Brayer Technique | www.juliedavison.com #stampinup

5 Stampin' Up! Lily Pond Lane Card Ideas with Thoughtful Moments Hybrid Embossing Folder & Rubber Band Brayer Technique | www.juliedavison.com #stampinup
I wanted to do a fun technique so I pulled this brayer technique out of the archives! It still works with the new brayer -- just remove the silicone brayer from the handle and wrap rubberbands around the barrel. Run the brayer across an ink pad to pick up ink and then roll it across a piece of cardstock. I used Balmy Blue ink and cardstock for these cards.
I used the 2-3/8" Circle Punch to create the window in the first card and then used that circle for the focal point of my second card.
5 Stampin' Up! Lily Pond Lane Card Ideas with Thoughtful Moments Hybrid Embossing Folder & Rubber Band Brayer Technique | www.juliedavison.com #stampinup

5 Stampin' Up! Lily Pond Lane Card Ideas with Thoughtful Moments Hybrid Embossing Folder & Rubber Band Brayer Technique | www.juliedavison.com #stampinup
I didn't have the coordinating Charming Duck Pond bundle when I made these cards, so I used using images from the designer paper and added greetings from the Thoughtful Moments Hybrid Embossing Folder. I used the brayer (without the rubber bands) to ink up the embossing folder and add definition to the sentiments before die cutting. There is one single die that fits into the embossing folder and die cuts all of the sentiments at once! 
I used Stampin' Blends to color inside the lines of the sentiments. The Thoughtful Moments Hybrid Embossing Folder includes ten different sentiments, so here are a few more card ideas using other greetings and the Lily Pond Lane Designer Paper. 

5 Stampin' Up! Lily Pond Lane Card Ideas with Thoughtful Moments Hybrid Embossing Folder & Rubber Band Brayer Technique | www.juliedavison.com #stampinup

5 Stampin' Up! Lily Pond Lane Card Ideas with Thoughtful Moments Hybrid Embossing Folder & Rubber Band Brayer Technique | www.juliedavison.com #stampinup

5 Stampin' Up! Lily Pond Lane Card Ideas with Thoughtful Moments Hybrid Embossing Folder & Rubber Band Brayer Technique | www.juliedavison.com #stampinup

Watch the replay of this past episode of Sunday Stamping with Susan & Julie for tips on creating these cards and doing the rubberband brayer technique. Watch Video

I love the colors in the Lily Pond Lane Designer Paper! I used most of them on these cards: Pretty Peacock, Balmy Blue, Pretty ink Pink, Peach Pie, and Gray Granite.


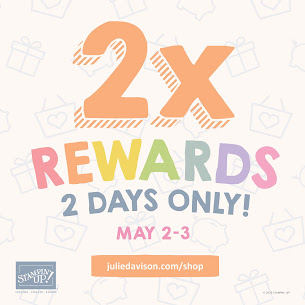
TWO DAYS ONLY: May 2-3, 2025 | Shop Now
Whether you are getting Last Chance Favorites, Scrapbooking Kits, or new Onlin Exclusives, Get DOUBLE Stampin' Rewards on your ENTIRE order over $20 on the Stampin' Up! Website May 2-3 to celebrate National Scrapbooking Day!


Live in the United States? 
Shop with Me and order $40 or more to receive my monthly project kit! Learn More


Wednesday, October 25, 2017

Guest Artist: Sandy Jacobson + 5 Glossy Cardstock Techniques

I am always inspired by what Sandy Jacobson creates! She is so talented! Sandy outdid herself for her Vacation Stamping School demonstration in August by showcasing not one or two, but MANY techniques using Glossy Cardstock -- which is back again in the latest Annual Catalog! Check some of Sandy's amazing projects!
Sandy showed many ways to spread color on to glossy cardstock. Because the cardstock is coated, it takes longer for the ink to set in and dry, which means that you have more time to smear, paint, and manipulate the ink. After you apply ink using an AquaPainter or sponge dauber, use water or alcohol in a Stampin' Spritzer to spread the color. The result will be different every time you try it!
Guest Artist: Sandy Jacobson + 5 Glossy Cardstock Techniques
Pin It!
Guest Artist: Sandy Jacobson + 5 Glossy Cardstock Techniques
Here are some more cards created by Sandy and her tips for some different techniques:
Guest Artist: Sandy Jacobson + 5 Glossy Cardstock Techniques
Pin It! 
Galaxy Technique: (inspired by Maria Willis)
  1. Use sponge dauber to sponge glossy cardstock with Daffodil Delight across the middle of the cardstock.
  2. Next, sponge Berry Burst around the Daffodil Delight and overlapping a little bit.
  3. Sponge Rich Razzleberry around the Berry Burst.
  4. Next, add Dapper Denim around the edges and over some of the other colors.
  5. Lastly, add Black ink by starting at the edges and working inward. Cover some of the other colors to it appears that the other colors are peeking through from behind.
  6. Flick some rubbing alcohol on to the cardstock using your finger or an AquaPainter.
  7. Flick Wink of Stella across the background to add sparkle.
Guest Artist: Sandy Jacobson + 5 Glossy Cardstock Techniques
Pin It! 
Polished Stone Technique:
  1. Saturate a cotton ball with rubbing alcohol and add about 3 drops of re-inker. Dab the cotton ball over the glossy cardstock.
  2. Add additional colors if desired and allow to dry.
Guest Artist: Sandy Jacobson + 5 Glossy Cardstock Techniques
Pin It! 
Retro Brayer Color Blocks Technique:
  1. Stamp your images on the Glossy Cardstock.
  2. Select 3 colors within the same color family (a light, medium, and dark color). 
  3. Brayer your cardstock with your lightest color all over. 
  4. Add a couple small sticky notes to cover 1-2 spots of cardstock.
  5. Brayer over your cardstock with the medium color. 
  6. Add 1-2 more small post it note.
  7. Brayer the cardstock using your darkest color. 
  8. Remove your post it notes and embellish your card.
Guest Artist: Sandy Jacobson + 5 Glossy Cardstock Techniques
Pin It! 
Tip: Sponge ink onto Glossy Cardstock then spritz with water to get a speckled appearance.
Guest Artist: Sandy Jacobson + 5 Glossy Cardstock Techniques
Pin It!
Wax Paper Resist Technique:

Supplies: embossing folder of your choice, a piece of waxed paper, a piece of cardstock, glossy cardstock, sponge daubers, ink pads, and an iron. 

  1. Cut the waxed paper to the size of your embossing folder and run it through your Big Shot. 
  2. Place the embossed waxed paper on top of your glossy cardstock. Add regular cardstock on the top and iron.  It won’t take long until the wax melts onto your glossy cardstock. 
  3. Remove the glossy cardstock from the embossing folder and sponge with the color(s) of your choice.
Stampin' Up! Shopping List

Live in the United States? I would love to be your Stampin' Up! Demonstrator!
Click HERE to  Order Stampin' Up! Products Online, Anytime!

2017 Stampin' Up! Holiday Catalog
Use Hostess Code SJMS7KT4 to get a FREE Make and Take Kit and FREE GIFT when you order $40 or more. Free kits are mailed at the end of the month. Limit one per person. Learn More